Posts tagged #daisy flower garden journey

Daisy Flower Garden Journey: Garden Party!!!

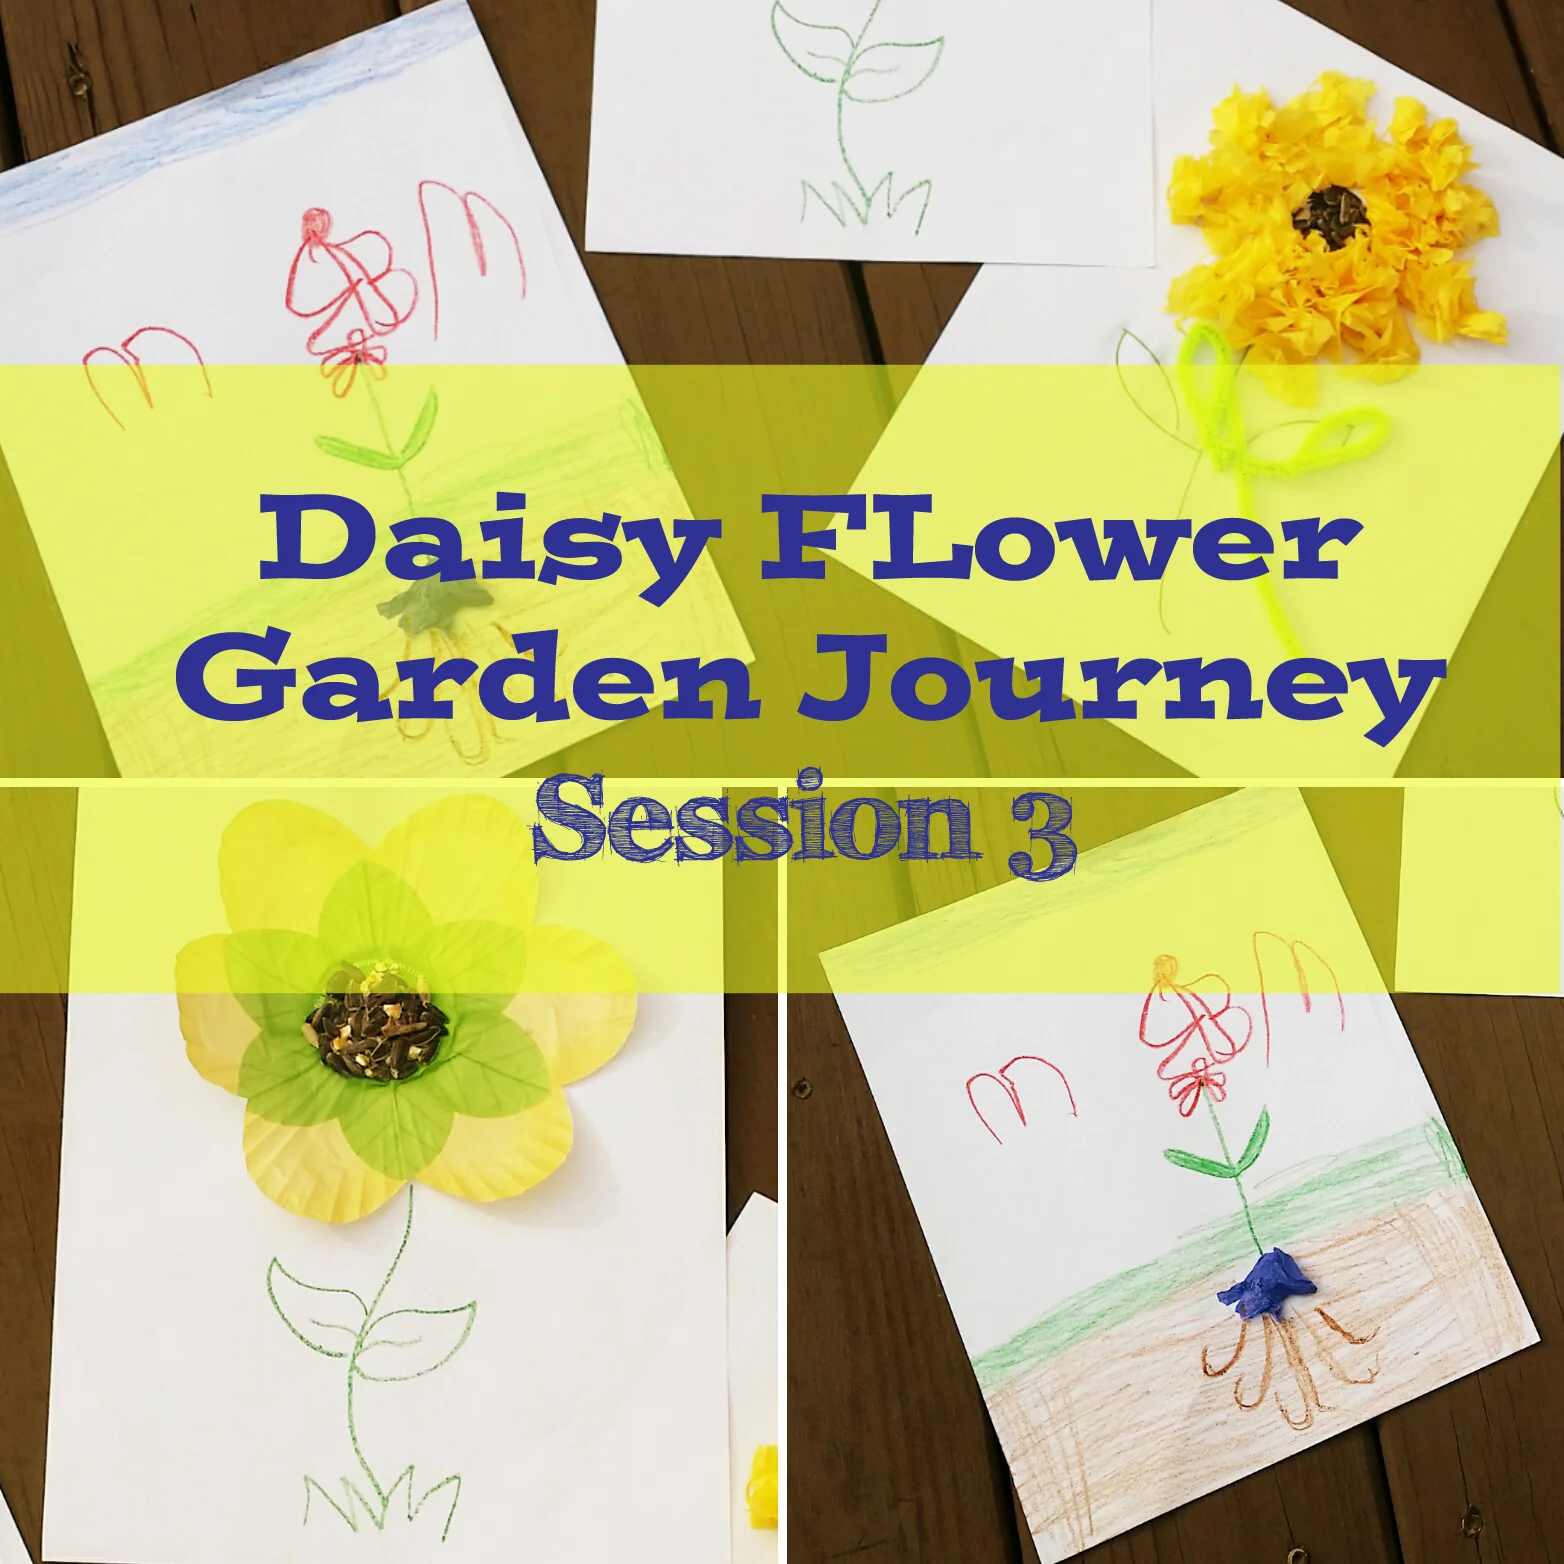
Wow! We've finally made it to the end of our Daisy Flower Garden Journey! We've had so much fun along the way and be sure to check out our previous sessions here: 

Session One

Session Two 

Session Three

Session Four 

Session Five and Take Action Project 

Garden Party

Here are some of the highlights from this journey!

  • Planted our seedlings in our individual terra cotta pots!
  • Learned all about our plant helpers while crafting bee pins, painting our river rocks to create ladybugs, tissue butterflies!
  • Created a worm composting bin!

What I would like to add the next time around..

  • Visit a community garden or plant nursery

  • Plant a community garden

  • Grow ladybugs or butterflies

And now for the GARDEN Party and our year end Court of Awards ceremony!

I made these cute little "cups of dirt" with gummy works to keep with the gardening theme. I took dollar store silk flowers and hot glued them onto the green spoons to make them look like floral stems! The cups of dirt are chocolate pudding and crumbled Oreo cookies. 

Court of Awards Ceremony!

This was the first time we had a Court of Awards. In the past the badges were presented to the girls at the end of the meeting but I had saved the last couple badges for this event. I knew I wanted to keep it simple and quick and make sure the girls had some time to partay and play!

The ceremony was held outside in my backyard. It was a beautiful day, despite the wind. Luckily, I have a large 2 tiered deck that was perfect for a ceremony stage! I knew THAT deck would come in handy when we bought the house less than 2 years ago.

Both the co-leader and I got up and said a few things about the year and the girls. I explained the Journey that they had been working on and what each part of the award meant and how the girls demonstrated this. Then we called each girl up and pinned her with the daisy corsage and handed her a certificate for completing the year.

Daisy Corsage

These were pretty easy to make and the girls really adorned them! If you're doing an awards ceremony it's super fun to dress up the package a bit to make the event all the more special.

Materials:

  • glue gun
  • silk daisy flowers
  • assorted matching ribbons (preferable in the colors of the age level)
  • puffy or fabric paint
  • bar pins 

I used dollar store white daisies. I made sure to clip with garden cutters the back of the flower to make sure it was as flat as possible.  You can hot glue your ribbon and to the back of the flower and then a bar pin to the back of the daisy. Staple the badges to the ribbons. White puffy paint was used for the girls name. This ceremony was also to reward girls for their fantastic Cookie Sales (which you can see there are a few goal achiever patches).

Presenting the Daisy Flower Garden Awards!

Originally, the Daisy Flower Garden award was presented in each girl's flower pot that they had planted in the very first session. It was a super windy day and the pots kept blowing over so we had to stick these in the large planters I had on my deck.

After the ceremony the girls showed off their decorations (they each got to decorate one of the flower friends and we strung them up with some string) and enjoyed the cups of dirt. We played some music and the girls had a fun time playing in our new playhouse! With it being our first Court of Awards and me being 9 months pregnant, it was kept relatively simple but the girls really enjoyed it and had tons of fun and got to finally take home their plants!

Posted on October 27, 2015 and filed under Girl scouts.

Daisy Flower Garden Journey: Session 5 Take Action Project

We've made it to session 5 of the Daisy Flower Garden Journey!!!

For more resources on the Daisy Flower Garden Journey check out previous sessions....

Session One

Session Two 

Session Three

Session Four 

Session Five and Take Action Project 

Garden Party

I've managed to get this journey finished in 6 sessions, including the Court of Awards ceremony and garden party for the last session!

Session 5 is all about the take action project the girls completed as part of the journey. We started the meeting off reading Chapter 5 from our Garden Journey books. Our troop did the worm composting bin for their project but there are endless ideas that you can consider. We did think about doing a community garden at the school but that didn't work out like we had hoped so we went to plan B.

Here are some ideas you can suggest to the girls to get them thinking. Remember: let them decided and keep it girl led.

Ideas for the take action project for the Daisy Flower Garden Journey

  • Worm composting bin

  • Create or spruce up a community garden at a local school, church, park district.

  • Grow ladybugs

  • Love Bugs

  • Find a need or issue in your area and have the girls brainstorm ideas to solve it.

Now for the worm composting bin!!!

What you will need:

  • two 10 gallon rubbermaid containers w/ lid.
  • Food scraps and other organic materials (see list)
  • newspaper and cardboard
  • water
  • drill with small 1/8 drill bit
  • Something to separate the two bins on top of one another, you will want about 2-3 inches. We used scrap wood left over from our deck (use resources wisely). You can also use large rocks.
  •  Red worms about 1/4 to 1/2 pound (we purchased ours from Bass Pro Shop but you can buy them in bulk online)
  • dirt... don't buy dirt just what every you can find in your yard. You will want a couple of small garden shovels full.

Ahead of time

Have your Girl Scouts start collecting food scraps ahead of time. Here is the example of the letter I sent home during session 4.  Download here: ----->>> Worm composting letter

Prepare your bin

  1. Decide which bin you will use to put your actual food scraps and worms in. Drill small 1/8 drill bit holes at the bottom to allow for excess water to drain out. Drill larger holes at the top on the sides of the bin, between 1 inch to 4 inches from the top. This will allow for ventilation.
  2. Take your second bin (bottom bin) and put in your material you will use to separate the two bins. You want to offset the bins by at least 3 -6 inches. This will allow the liquid from the composting bin to drain out so you don't drown the worms. This liquid is also considered compost tea! We used two pieces of scrap 2 x 2 wood, large rocks work as well.
  3. Place your bin with the drilled holes inside of the bottom bin. Save the lid and you are ready to start adding your goods.

Add your goods!

Now that you have prepared your bin you are ready to get the composting environment started for your worms.

  1. Add some bedding... What is bedding? It's your paper scraps such as shredded newspaper, paper bags, cardboard. YOu will want to lightly dampen, not soak, with a sprinkle of water.
  2. Add dirt. This will help the worms with digestion and help the "process" along.
  3. Add your food scraps... please reference the list provided on the letter on worm composting. I had each girl tells us what her scraps consisted of and add them in. Sprinkle lightly with a little water to moisten.
  4. Add your worms. For the girls that are not scared of worms (courageous and strong), which ended up being all of them by the time we got down to the last of the worms, have them hold the worms and add them into the bin themselves. Advise them to be gentle and quiet as you don't want to shock the worms. There were girls that were afraid to touch them but after seeing the rest of the troop participate they mustered up the courage. Make sure each girl gets a chance even if she turns down on the first try.
  5. Cover with bedding. Don't be afraid to be liberal with this. You want to add enough to keep the bugs and flies away from your composting bin. Add some bigger pieces of wet cardboard on the top.
  6. Put the lid on and let it chill! By chill I mean don't continue to move your bin around and place it in a quiet place. I put it in my garage for the first two weeks. I recommend also putting it in the garage and leaving the light on for the first couple of days. 

What I noticed, and I'm glad I put it in my garage to start, was that some of the worms started trying to escape. Some worms trying to escape is normal. You've taken these little creatures and put them into a new environment and potentially shocked them with the move so naturally you will have your rebel worms trying to leave. If you noticed that there are too many trying to leave you will need to troubleshoot your bin for potential problems.

Things to remember:

Temperature: 35 to 80 degrees - covered from sun and rain.

Feed your worms, about every 2 weeks or as you gather new organic matter.

Too wet = worm evacuation. Bins and bedding should not be dripping.

Flies = not enough bedding/ Continue to add bedding to the top to keep the environment happy.

Stenchy = too much food. If your bin starts to smell like something is rotting, you have a problem. Your worm bin should smell earthy, not stenchy.  LOL

Do you have any other suggestions for the  Take Action project? 

At the end of the meeting I handed out special invitations for the last session and final meeting for the year! Here is a copy of the publisher file--->> Court of Awards Ceremony and Garden Party Invitation.

Stay tuned for the final session of our Daisy Flower Garden Journey!

Posted on October 15, 2015 and filed under Girl scouts.

Daisy Flower Garden Journey: Session 4 Plant Helpers

Hello Girl Scout Volunteers!

Today we are continuing on with the Daisy Flower Garden Journey with session 4!

Last session our focus was on the parts of a flower. The theme of this session was all about our plant helpers... aka bees, butterflies, ladybugs, and worms! In case you missed the previous sessions they can be found below...

Session 3

Session 2

Session 1

Start up Activity: (5-10 mins)

Record their seedlings by drawing a picture in their notebooks.

Pg. 61 or pg. 62 from Welcome to the Daisy Flower Garden

Activity: Discuss the different plant helpers and their importance. (5-10 min)

I created a quick poster that titled "Plant Helpers" I printed out pictures of a bee, butterfly, ladybug, and worm. We discussed how bees and butterflies help pollinate plants to they bear the fruits and vegetables and without them many of our foods would not exist. We talked about how ladybugs help to keep out certain bugs that are bad for plants and how the worms help to create nutrient rich soil.

Activity: Ladybug Garden Rocks and Read Chap. 4 (30 mins)


Materials:

  • 1 flat rock for each girl (river rocks work great and you can buy a bag of them at the Dollar Tree)

  • Red, Black, and white(optional) paint

  • small paint brushes or q-tip

Have the girls create their own garden protectors by painting their rocks to look like ladybugs. First, start by painting the entire rock red. Allow it to dry for 10 minutes. Then add black spots and the black head. You can use the back tip of the paint brush to create the small spots. This might be easier for the girls. Allow to dry. If you have enough time you can add two with dots on the head for the eyes. While the girls are painting and you allow time in between to dry READ chapter 4 from Welcome to the Daisy Flower Garden.

Activity: Tissue Butterfly (10 mins)

Materials

  • colorful pipe cleaner

  • 8 in x 8 in tissue paper

  • clothes pin

  • black marker or crayons for decoration 

  • googly eyes (optional and requires glue and time to dry)

Fold the tissue paper accordion style leaving about an inch in between folds. Then crunch the center to fit in the clothes pin and fan out the tissue. Fold the pipe cleaners in half and curl up the ends to look like antennas. At the fold, insert the antennas into the tissue butterfly. Have the girls add in eye and decorate the body of the butterfly as they chose.

Discuss the Take Action Project (5 mins)

After we finished our projects and washed up and cleaned off the tables we sat down for our closing ceremony. We used this time to discuss ideas for our Take Action project and the girls were interested in the Worm Composting idea! Other ideas that we discussed was planting a community garden at the school, and raising ladybugs or butterflies.

Wrap up with a Friendship Squeeze!

Stay tuned for the next post on our Worm Composting bin and our Garden Party Court of Awards Ceremony!


*Images used in this post were created and are property of 3 Wittle Birds. Permission must be first granted along with a link back to our website before use of images. Thank you.

Posted on September 28, 2015 and filed under Girl scouts.

Daisy Flower Garden Journey: Session 3

"He who plants a garden plants happiness." ~Chinese proverb

Hey Troop Leaders!

Last spring our troop journeyed through the Daisy Flower Garden. You can actually find the first two sessions here: 

Daisy Flower Garden Journey: Session 1

Daisy Flower Garden Journey: Session 2 (Bees)

Session 3 Theme: Flower parts and Seeds

For session 3 of the Daisy Flower Garden Journey our focus was on the parts of the flower and how flowers produce seeds. 

Start up Activity:

Have the girls color the Mari page and/or PG. 44 and 45 in the GB (Welcome to the Daisy Flower Garden ) If you remember from previous sessions, I printed out copies of these pages and pasted them into their Garden Journal. This is a great way to record their seedlings current progress.

Have the Girl Scouts water their seedlings!

Activity: Read Chapter 3: Amazing Daisy and Her Flower Family from GB

Activity: Flower art project

Girls this age love expressing themselves through art and this is a wonderful activity that they enjoyed. I would keep this one easy and let the girls run with it. Prior to the meeting send out an email or letter asking the girls to bring supplies from home. Try not to buy anything new and encourage the girls to use what they already have as all Girls Scouts "use resources wisely." I created a template that I would love to share with you all and can be found here: Flower outline template

Possible ideas for materials

  • tissue paper
  • construction paper
  • pipe cleaners
  • yarn
  • bird seed
  • cupcake liners
  • crayons
  • glue
  • beads
  • sequins
  • Flower template

Here is the project done a couple different ways.

1. Freestyle drawing. 

My daughter used tissue paper to represent the seed. She also colored all the parts of the flower that we discussed.

2. Cupcake liners and bird seed.

I had some cupcake liners leftover from a previous party. They were already in the shape of a flower so this worked perfectly!


Activity: Paper Marigold for Mari petal "Responsible for what I say and do"

This activity is in place of not in addition to the flower art project. Make a paper marigold for Mari and talk about what it means to be responsible for what they say and do.  Tell the girls by taking care of their seedlings they are being responsible. Ask the girls what other ways they are responsible at home?.... chores, making their bed, taking care of a pet, ect...

Here is a great example of another troop leader who did a marigold tissue flower.

Closing Ceremony:

Friendship Squeeze and presenting of badges! Girls earned their Watering Can Award and their Mari petal (Responsible for what I say and do). Woo hoo double whammy!

"A garden is a grand teacher. It teaches patience and careful watchfulness; it teaches industry and thrift; above all it teaches entire trust." ~ Gertrude Jekyll

For more resources on the Daisy Flower Garden Journey check out previous sessions....

Session One

Session Two 

Session Three

Session Four 

Session Five and Take Action Project 

Garden Party

Posted on September 10, 2015 and filed under Girl scouts.

Daisy Flower Garden Journey: Session 2

For more resources on the Daisy Flower Garden Journey check out previous sessions....

Session One

Session Two 

Session Three

Session Four 

Session Five and Take Action Project 

Garden Party

We are on our way through the flower garden journey! The girls were super excited to plant their seedlings last meeting and even more excited to see the little sprouts this week. This is session 2 of our journey through the daisy flower garden. Use this as a blue print or guide and alter as you see best fits your daisy troop!

Materials needed:

  • Leadership guide (LG)
  • Welcome to the Daisy Flower Garden girl book (GB)
  • Photocopies of pages 13 and 26 from GB (enough for each girl)
  • black pipe cleaners (cut into 2 inch pieces)
  • safety pins
  • googly eyes
  • mesh tulle in light yellow or white
  • small yellow craft pom poms
  • hot glue gun
  • regular glue
  • ink pad
  • bubble wrap
  • Garden Journal from session 1
  • mini gardens from session 1
  • crayons or other coloring tools
  • watering can

Preparation before the meeting

Prepare the bee pins

I hot glued the pom poms together prior to the meeting. I tried to use regular glue at first and it didn't stick together very well. I didn't want the girls to be using the hot glue gun, which is why I prepared them ahead of time. For the bee body, I used three yellow pom poms.

Prepare the garden journals

I rubber cemented the photocopies of pages 13 and 26 from the GB into the garden journals for each girl.

Meeting outline

Start-up activity

Set out the garden journals and crayons on a table. As the girls arrive, have them complete page 13 from the GB that you previously glued into the garden journal.

Opening

  • Gather in a Daisy Circle and recite the Girl Scout Promise and Law
  • Have the girls go around in the Daisy Circle and share their page 13 from the garden journal. Make sure each girl gets a turn to share.

Recap and Read Chapter 2

Recap chapter 1 from the GB so the girls remember where you left off in the story. Read chapter 2. When you get to the part of the story where the girls find the buried box have your daisy scouts color page 26 from the GB in their garden journals. Follow up at the end of chapter 2 with questions to ensure they comprehend the story.

Bee pins

The girls loved making this little swap. Not that they had to swap them but it is a great idea for a swap. Prior to the meeting it will be helpful if you hot glue the yellow pom poms together as regular glue doesn't hold well.

How to...

1)

  Have the daisy scout wrap the black pipe cleaner around the pre-glued yellow bee body (pom poms) and the safety pin. If you wrap both the body and the pin together there is no need to glue the bee to the pin later

2)

Tie the yellow mesh tulle strip around the bee body to give a wing effect.

3)

Use regular glue to glue on the googly eyes.

There you go! Simple as that!

The girls can pin these to their vests as a remembrance of the helpful honey bee introduced in chapter 2!

Honeycomb Stamping

This is a fun little activity that the girls can do right in their garden journals. I used bubble wrap and an ink pad. You can cut the bubble wrap in the shape of a honeycomb. This is a great opportunity to explain the importance of bees in a garden. Some points I made sure to hit on are...

  • Bees are very important in a garden.
  • They help pollinate the plants so we have food
  • They drink the nectar of the flowers to produce honey

The girls can even draw a bee of their own on this page if they have some time or you can give them bee stickers.

Mini Garden Care

Have each girl water their mini garden. Make sure you explain how we are being responsible for the plants by watering and caring for them.

In their garden journals, have the girls draw a picture of how their gardens plants are doing. You can do this on a new blank page. Make sure they record the date of their findings! Each meeting the girls can record how big their plants are getting so they can look back on the progress from the previous meeting.

We finished off the meeting with a closing ceremony and friendship circle and squeeze! If you would like to see what we did for the first session visit my post: 

Daisy Flower Garden Journey: Session 1!

Don't forget to follow along for more Flower Garden Journey sessions!

 photo bloggersig.jpg

Daisy Flower Garden Journey: Session 1

For more resources on the Daisy Flower Garden Journey check out previous sessions....

Session One

Session Two 

Session Three

Session Four 

Session Five and Take Action Project 

Garden Party

An Introduction into the Daisy Flower Garden Journey

We recently started our adventure with the Daisy Flower Garden Journey. Its part of the national Girl Scouts program for daisy scouts. I was really excited to start this journey as I love gardening and thought the spring time would be a perfect introduction. Since we are already several months into the program and have earned several of our petal badges and nearly mastered the Girl Scout law and promise, I didn't follow the leadership guide exactly as planned. If you are just starting out with first time daisies, the leadership guide would be a great start as it introduces the promise and law.

When I first started my planning for this journey I read through the "How to Guide" first and then the girl's book "Welcome to the Daisy Flower Garden". Each chapter of the girls book is to align with a session or meeting and concluding the journey at session 6. Don't be afraid to alter this depending upon your goals for the troop. If you need to extend this out that is perfectly fine. 

Before the first meeting

Preparation is very important for the first meeting. There are many supplies you may need to purchase. I wanted the girls to have a field journal throughout this journey to record everything and have something to look back on as a keepsake. This required me to print and copy pages from the Girl book (GB) and paste them into each journal a head of time. Read on to the Field Journal section on how to pre-assemble.

Materials

  • Leadership How To Guide (LG)
  • "Welcome to the Daisy Flower Garden" book (GB)
  • Potting soil
  • seeds ( basil and assorted flowers)
  • garden shovel
  • garden gloves
  • small gardening pots (one for each girl) I found these from the Dollar Store in sets of 2.
  • tray or storage container to carry the pots
  • Seed starter kit (like this one)
  • composition notebooks (one for each girl) Purchased from the Dollar Store.
  • rubber cement
  • crayons or other coloring utensils
  • photocopies for each girl of ... GB pg. 8,9,10,12   Optional pgs. 11,13

Here is how I broke down the first session.

Start-up activity: 

As the girls arrived, they completed page 9 (from GB) in their field journals. Make sure all the girls complete this page as you will be sharing during the group discussion.

Flower Garden Field Journal

Prior to the meeting put together the field journals by pasting in the photocopies of the pages from the girl book (GB pgs. 8, 9, 10 ,12) with rubber cement. I like using rubber cement because it doesn't crinkle the pages and dries fast. I used a new page for each photocopy. I just glued to the front of each notebook page, not the back. 

*Note: I started with Page 9 first and then followed with the girls bios. (ex. 9, 8, 10, 12)

I explained to the girls that I would be keeping these journals between sessions. This ensures that each girl has a notebook for every meeting and if I need to do any preparation between meetings I have them available.

GB pg. 9

GB pg. 10

Opening:

  • Form a Daisy Circle and practice the Girl Scout Promise and Law. 
  • Have each girl share what they wrote and colored from the start-up activity (GB pg. 9). 
  • Explain what the Garden Journey is and what the girls can expect for the first session and the rest of the Journey. I took this time to explain about the Take Action Project.

Introduce Daisy Journey Girls

Introduce the girl characters by reading the short bios of each one. As you read through each one have the girls color the page in their Field Journal (pages 8, 10, 12). After you read each one, do a recap. Ask questions like "where are they from" and "what do they like to do".

Garden Story Time

Read the first chapter of the Garden story (GB pg. 17). Recap the story at the end and follow up with some questions about the story. You can also reference the questions from the LG on page 41.

Mini Garden Planting

You can start by having the girls decorate their own pot or use a permanent marker and write their names on the bottom of the pots. Start an assembly line by filling the pots with dirt about 3/4 of the way to the top. We used basil as it's pretty easy to maintain and doesn't require replanting. Have the girls plant their own seeds and lightly cover with some soil. 

Next, have a small watering can for the girls to water their seedlings. Have a long container or tray for the girls to place their pots in when they are finished. This will help in transporting the flower pots to each meeting. I explained to the girls that I would be keeping the basil pots for the journey and bring them to each meeting. The girls will be allowed to take home their basil pots at the completion of the journey. This ensures that each pot is brought to each meeting and no girl is left out.

I also had a separate seed starter going for the flower seedlings. I explained to the girls this was in preparation for their take action project where they will plant a community garden with the flowers they start today. Several meetings previously the girls had voted on what they wanted to plant and agreed upon flowers. I wanted to make sure this was still an option for them.

You can use a seed starter like this one.. Seed starter kit (like this one )

Daisy Game, Garden-Style

Refer to page 44 in the LB. Have the girls get in a circle and talk about the different critters you find in your community and garden. Explain that the girls will be the critters that live in a garden. This game takes about 5-10 minutes and is a great way to conclude the meeting and get the wiggles out!

Closing Ceremony and Friendship Squeeze

Found on page 45 of LB.

I hope this helps you in your planning and encourages you to think outside of the box. Don't be afraid to do something different from the program to best suit your troop and the needs of your girls! Don't forget to check back for more updates and ideas for the remaining sessions of the Daisy Flower Garden Journey!

 photo bloggersig.jpg

Butterfly Modeling Clay Craft and Magnet

March is a hit or miss when it comes to the weather in the Midwest. This winter has been unusually cold. It just seems like everything is wet and cold, but I guess that is what spring is about here. 

Since we are just inching to get outside and beat the cold weather blues, we had a little fun with some modeling clay! We got this clay as part of a goody bag on a trip to our favorite zoo last fall. It's been hiding in the top cabinet for some time now. I was hesitant to bring it out for fear of it staining the carpet or furniture... in fact it does!

Since spring is here and we have a great unit study ahead of us, I thought we could kick it off with a fun Butterfly craft.

Despite how hard the clay was, the girls had a ton of fun playing with it and molding it. Mommy had to do some flattening and shaping for them. It was also a great opportunity to introduce symmetry to my kindergartner. Once we were done shaping and decorating, we placed our creations into a bread pan.

Place in glass or metal oven safe dish. Do not microwave. Bake at 275 degrees for 15 minutes per 1/4 inch thickness.

Allow them to cool completely before handling. They will become hard.

*We attached magnets to the back of them and now they are sitting pretty on the fridge holding up the latest masterpiece by my little ones.

Check back soon for some more spring crafts!

If you like what you read today, kindly follow along...

Follow @twitter