Posts tagged #Crafts

Container Gardening and free classes with Craftys!

I've always wanted to have my own farm with tons of gardening beds to grow enough fruits and vegetables to feed my family for the entire year! Living on a farm and having enough acreage to have a garden of that size is not very easy or financial realistic living in the suburbs of Chicago. Unless, you want to drive far outside the area to afford something like this.

We were blessed to purchase a home that has an amazing backyard. To be honest, the deciding factor in our home search was the yard. We're outdoorsy people and need a space where we could really do what we want. With that being said, I need to be methodically and inventive with how I plan my garden this year. While it would be amazing to fill the entire backyard with raised garden beds that wouldn't be fair to the kids or the hubby. So instead I am looking more into container gardening and utilizing our amazing and rather large deck as a place to layout my plans.

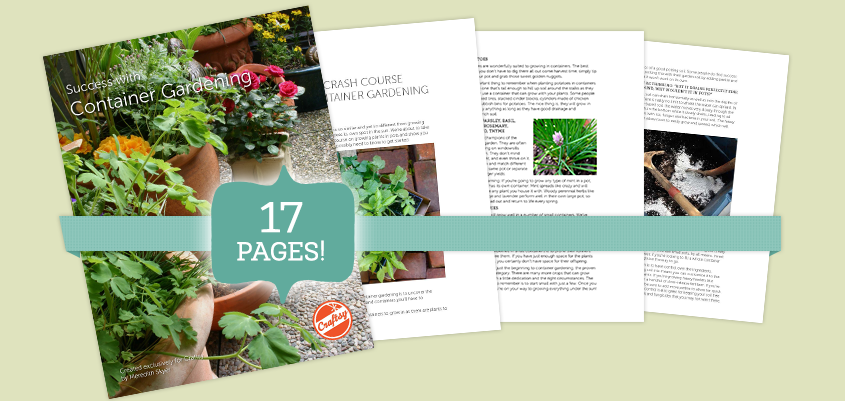
Craftsy offers this free PDF on container gardening.  This is a great resource to get started. Not only does it give you a crash course on container gardening, it also educates you on the best plants for this type of option. My favorite part was the recipe on how to make your own potting soil! Container gardening is a great option for anyone who is limited on space such as an urban garden.

Craftsy also offers free online gardening classes! Make sure to check out their website because it doesn't just stop at gardening! They offer a wide selection of online courses from embroidery to woodworking or paper crafts! 

Would you like to see more of the free resources that Craftsy has to offer? I would be happy to share some more with you! Please share the area you are most interested in!

 photo bloggersig.jpg

*This post contains my affiliate link that helps support my family.

DIY: Refurbished Kids Cottage

Have you seen that thing on Pinterest, with the DIY of the Little Tykes kid cottage? Well, I tried it! 

I used

Krylon Fusion for Plastic

 in red, white and brown. 

What I used....

3 cans of white

2 cans of red

2 cans of brown.

Here's what I did....

  1. Dissembled the house. I took off the door and shutters.
  2. Power wash both sides of all pieces of the play house and allow to air dry
  3. Use a drop cloth or a large piece of cardboard under to protect the grass or drive way from the spray paint.
  4. Evenly spray coordinating pieces with the color you choose. Allow to dry for at least 45 minutes.
  5. Turn over the play house pieces and spray paint the opposite side as well as the sides.
  6. Allow all pieces to dry over night to avoid chipping when you put the house back together.

Tip: Do this outside and on a day that is

NOT WINDY

or you will go through too many cans of spray paint!

Also, I only did the outside of the house in white. Since the inside was a faded yellow, I didn't really notice that much of a difference and it saved me time and money!

How did it really go?.....

I spent about 40 dollars on spray paint and from a distance this actually looks pretty cute. When I started to put the house back together, some of the red paint, on the doors and shutters,  smeared with the white pieces. It makes it look a little cheap but my girls really enjoyed it.

I spent all total of 5 hours and a sunny afternoon. For the time and the money, I probably wouldn't do this again. It was a free garbage picked playhouse that needed a little face lift.

Here is what it used to look like....

Don't for get to follow me on

Pinterest

!!!

Posted on November 11, 2013 and filed under Create, Family.

My Memories Scrapbooking Software GIVEAWAY!!


Happy MLK day!! To celebrate and kick off the week, we have a giveaway!
I am so pumped to have my very first GIVEAWAY!! I was asked to try out this wonderful software called My Memories Digital Scrapbooking Software. It could not have came at a better time with our upcoming Walt Disney vacation ! Considering I haven't been able to finish the scrapbook pages from our last vacation 2 1/2 years ago, I think I need to give the digital scrapbook method a try.

Come to think of it, my hubby is a big fan of the digital memory keeping!! Last Mother's day he created me this very sweet digital book with pictures of the girls!! So cute! I've been thinking of creating family year books!! How cool would that be?

So... I played around a bit to show you all how easy it is to create a page in no time!! My favorite thing is all the different kits available! You can also you your own digital graphics if you have purchased some in the past!!! The tools are so easy to manage, I didn't even need a "how to" or tutorial!!

I am offering you a free My Memories Suite software to try for yourself!! Woo hoo a giveaway! Check out the site and enter below! Let me know what your favorite digital kit is?!?!


promo code: STMMMS70434

Easy Party Banners

I made this banner for my daughter's 2nd birthday. This idea is so simple and easy.

Making your banner letters
Print out your lettering on your computer with a font style that matches your theme. I used Microsoft Word Font: Harrington Size:300. I used two spaces between each letter and adjusted the paper layout to landscape.

Cut out your lettering with some fun crafting scissors.

Select your background paper for the banner. You can have just specific colors or patterns. Match the theme of the party. I used scrap booking paper and cut each page in quarters using a cricut cutter. Each sheet was 6 x 6.

Paste your cut out letters to your background paper, centering as best as possible. I used a simple glue stick.

Assembling the Banner
There are many different ways you can do this, just be creative.

Punch hole: you can use a punch hole on the left and right sides of each banner piece to string through ribbon. You can string through the entire banner or connect each piece separately with individual ribbon pieces.
Horizontal banner!
Try a vertical banner!


Clothes Pins: If you don't have a punch hole or want a different option clothes pins are a great way to assemble your banner. You will need one for each banner letter. You simply string up you ribbon or garland, and attach each banner pieces separately with a clothes pin. Space each piece for your desired look.

These banners are not only easy and cost very little, they look personal and crafty! Your guests will love them.
Posted on June 1, 2011 .

Mother's day Ideas

I was searching one of my favorite wesites Disney Family (you should definitely sign up and send me your email address so I can invite you to be my friend!) when I can across the Mother's Day section!!

10 Memorable Ways to Celebrate Mother's Day (this one should be passed along to the husbands!

I like this one, Minnie's Royal Tiara for the Mom's!

You can make a World's Greatest Grandmother Certificate!


Posted on May 3, 2011 .

Project: Wedding Shadow Box

I was looking for ways to display some of my things from my wedding. I wanted to use our invitation, program and some florals from my bouquet. I found this deep shadow box at a home goods store for 15 bucks! Heres what I was able to design. I used my pins from the bouquet to stabilize the stationary. I hot glued the dried flowers after careful dissembling of the bouquet and rearrangement. I was very pleased with the way it turned out and it is now hung on my wall next to our wedding portraits!

Posted on January 28, 2011 and filed under Create.

Party favors!

I started planning

Bella's second birthday party

early this year... real really, like

4

months. I had a lot of ideas and didn't want to be overwhelmed at the last minute.

In preparation for the party, I created these a

DORAble explorer backpacks

! They fit on my daughter perfectly! I created one for every child attending as a party favor goody bag.

I created the whole thing with felt. I used the 

Backpack and Map Template

 to create the facial details. I designed the shape and straps myself on a piece of paper.

I hope the kids get a kick out of them!

Posted on January 24, 2011 and filed under Celebrate, Create.