Posts filed under Raising Girls

Mighty Girls Halloween

This year was the most difficult in finding the right costumes! The girls started out with other ideas. Even searching a month in advance, finding their costumes in the right sizes, proved to be a challenge. Bella wanted to be a Rockford Peach but I couldn’t find one in a tween size and honestly didn’t have the time to sew one. Ryleigh has been asking for months to be Neytiri from Avatar but the only kids medium costume came at a $200 price tag!

When their first picks weren’t working out, we’d turn to their second choices……

When Siblings Fight

I'm not usually one of those Moms that gets excited for back to school. I love the time I have together with my kids and I'm trying to take it all in and what time they have left being young. This summer was a little... well... we will call it different.

Star Wars Birthday!

I'm so excited that I'm finally posting these pictures for you guys!! Bella requested a Star Wars theme for her birthday this year and I have to admit I was a little apprehensive. I am not familiar with the movies, like she is, but luckily I had my friend, Denise, to assist me. She also happens to be a huge Star Wars fan!

Dessert & Favor Table

The dessert/favor area was the main set up. We scaled this party down a bit from our usual party decor but I think the details we did incorporate made a big bang!! 

  • Glow stick light sabers: Dollar Tree glow sticks, duct tape, and sharpie marker
  • Tie fighter hanging by command hooks.: I purchased mine here: Tie Fighter 3D Model kit
  • Darth Vader and *pink* storm trooper cupcakes
  • Storm trooper goodie bags: I used a storm trooper graphic and printed them out. I cut out the faces and used rubber cement to glue them to your typical white lunch bags.
  • "Come to the dark side We have cupcakes" print out and pink frame provided by: Everything But The Cake

The backdrop is a twinkle light star wall. It's super easy to make. You can take a black foam board and use a drill bit to drill holes in the board for your lights to poke through. I secured the back with duct tape to make sure the lights stayed in place. Regular white Christmas lights would work.

Food Labels

Chewbacca's Chips

Sarlacc Pit Dip

Vader Veggies

Jabba Juice (not pictured)

Vader, storm trooper, and ship cut outs were also provided by Everything But The Cake. In the hallway we tried creating a star wall with twinkle lights and a black table cloth but the photograph didn't do it justice.

Pink Storm Trooper Cupcakes

Initially I had a plan for a cake but poor planning didn't allow that to happen. Instead I whipped up these super easy cupcakes topped with a pink marshmallow storm trooper. I used a Wilton food marker to draw on the faces.

Invitations

Pink Star wars_edited-demo.jpg

You can order your own custom Star Wars invites in our SHOP!

Party Fashion

Check out my friend Denise's shop for the shirt and bow: Wonderland Bowtique

What do you guys think? I think this would be super cute for a Girl Scout overnight with a Star Wars theme!


World!

Spa Science: Make Your Own Lip Balm

Bella has been into STEM subjects lately and really loves science experiments! I love this side of her and I only want to encourage her exploration, which is why when she begged to make another YouTube video I couldn't say NO. 

We are avid library fans and constantly have 30+ books checked out at any given time. She recently checked out Cool Chemistry Activities for Girls and was excited to try the lip balm activity!

You can make any flavor you like. The recipe calls for peppermint but we used strawberry extract instead! This recipe works great for a Spa Science party or as part of the Home Scientist Brownie Badge!

Bella was super excited about a book she found and wanted to try out the lip balm recipe! She was excited to find out she can apply this to her "Home Scientist" Brownie badge for Girl Scouts! Materials needed: 1 tsp shredded beeswax 1 tsp honey 1 tsp olive oil or coconut oil 1/4 tsp flavored extract (peppermint, strawberry, whatever you like!)

Thanks for watching!

Posted on January 14, 2017 and filed under Girl scouts, Raising Girls, STEM.

STEM gifts for your Mighty Girl

Posted on November 29, 2016 and filed under Raising Girls, STEM.

How to Tie Dye Shoes with Sharpie

I'm really excited to share with you Mamas this easy and fun activity your kids can do by themselves! My 4 year old was able to do this so the younger age's can do it too! 

What you need:

  • Canvas tennis shoes (Walmart for $5.99)
  • Assorted Sharpie Markers
  • Spray bottle
  • Rubbing Alcohol

Step 1: Take out the laces and decorate you shoes. 

I hinted to the girls that symmetry might look best but really let them design/color their own shoes. I do recommend sticking with 4-5 colors. You don't need to press in hard but you do want to fill in all the areas that you don't want white. This will give it the best tie dye look.

Step 2: Spray your shoes with Rubbing Alcohol.

I recommend doing this outdoors or in a well ventilated area. If you don't have a spray bottle you can use a dropper as well. Spray until you get the desired look. This might take a couple rounds of spraying.

Step 3: Allow to dry.

The girls REALLY enjoyed this activity! It was super easy for them and left room for creative mistakes. The best part, they did it all by themselves! They have been wearing these shoes nonstop and have been receiving so many compliments!

Posted on August 15, 2016 and filed under Create, Girl scouts, Raising Girls.

Daisy Girl Scout troop Necklaces

Hey Leader Friends!

So to be perfectly honest, I'm not a fan of leaders giving out end of the year gifts and I totally think it should be the other other way around but I really couldn't resist these! lol

The idea is pretty simple and affordable. It could also be used as a jewelry making badge if you have the girls make their own! 

Materials

  • roll of ball chain with clamps
  • Blank bottle caps w/jump rings attached ( I used 5/8" mini bottle caps from Hobby Lobby)
  • E6000
  • bottle cap image/Printable
  • photopaper
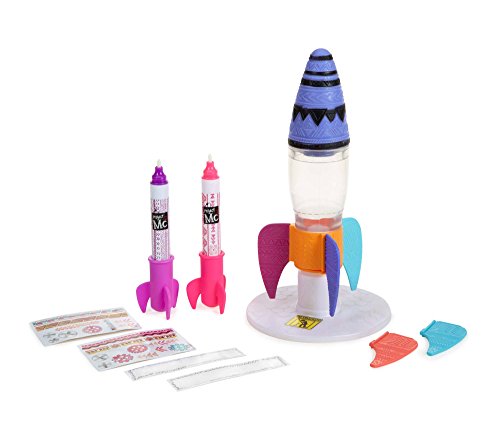
  • Magic dimensions

Optional:

  • dangle beads (Hobby Lobby) and stampable plates

1) Print and Cut out your 16mm (diameter) printable circles

Print out your image on photo paper. Regular paper will not work and it will get wet. If you have a circle punch small enough for this that would be idea but I used scissors. Use E6000 to adhere your printable to the bottle cap. You can also use rubber cement but I find that E6000 works the best. Allow it to dry. It can take a couple hours. If you are doing it with a troop and are pressed for time you can use rubber cement but make sure you don't get it on the front facing image.

2) Apply Magic Dimensions

Word of advice, dispense a small amount of the dimensions goo on a piece of paper first to avoid air bubbles. Start in the center of the cap and in a circular motion fill the entire bottle cap. If you go a little over that is okay. When the dimensions goo dries, it sinks a bit. Use a tooth pic to get out any air bubbles... if you see below, the air bubbles will dry like air bubbles so get them out. Allow this to dry for 3 hours or overnight.

--->> Your can find the Custom Printable here <<---

3) Assemble your necklace

If you purchased the bottle caps that already have the punch with the jump rings then this will be easy. You can cut your ball and chain cord to the desirable length your girl prefers. I recommend 18 inches long. Attach your connectors and voila! 

If you want to go an extra step, you can add colored dangle beads link in the picture below. If you have a stamping set, they you can also add initial plate charms too.

Thanks for joining me today! Don't forget to subscribe to our newsletter for all the goodies and updates!

Why Organic Cotton Matters for Girls!

I'm a big proponent of organic food. I've been to a couple marches and rallies and I believe food should be our primary concern when it comes to our health.

Cotton I've not been so concerned with until recently. In the past I have thought to myself "why does organic cotton matter?" We just wear it. Truth is, we wear in in more ways than just clothes and for women and girls we need to be aware of the products we put into our bodies too!

Cotton is one of the largest genetically modified crops. Cotton is also in our tampons and feminine pads. We much have forgotten that. Do we want those pesticides and chemicals to be absorbed into our bodies, specifically in the lady areas?

NO, absolutely not! This isn't just a woman's issue. It's also for our girls.

Is it just me or does if feel like girls are getting their periods earlier and earlier? I mean 8 years old? So yeah, this is a girls problem too.

Toxic Shock Syndrome

Cervical and ovarian cancer

Fertility problems

birth defects...

Need I go on?

So make a conscience decision next time you purchase feminine products and go organic cotton! We don't want those nasty chemicals down there so lets be more picky about what we put into our bodies. After all, isn't that what we should be preaching? Do ya get me?

*This post contains an affiliate link which helps support this website

Posted on May 23, 2016 and filed under Happy Mama, Wellness, Raising Girls.

Summer reading list pick!: The Girls' Book of Flower Fairies

The Girls' Book of Flower Fairies
By Cicely Mary Barker

I have to tell you about this book by Cicely Mary Barker. I remember as a child that I had that one special book that I would get excited to open up each and every day to find something new that I didn't read before. This book is like that!

The hard cover and gild rimmed pages set you on a magical adventure from the very first touch. The beautiful illustrations on each and every page capture the imagination and spirit in a young girl. 

My girls absolutely adore this book and have loved on it so much over the past year that it's almost falling apart. Not due to lack of quality, but because they read it EVERY day excited to find something new!

You can find so many things in this book to keep the kids busy for hours. The stories are so enchanting and the recipes and crafts open up my daughter's imagination and love for these little creatures! 

My favorite part of the book is the "How to throw a Fairy Party"! It outlines everything your girl will need from invitations and decorations to songs and drink recipes! 


Arts and Crafts!

Tons of easy and fun crafty ideas that kept our kids busy all summer long.

Story Time!

Fairy Names

They call me Strawberry Featherfoot! This is a super sweet name where you pick the preferable option that leads you through to get your very own fairy name! Oh, the giggles!

I could go on and on but really you have to get this book for the sweet little darling in your life. This is a great summer reading book that your girl can sit with under a tree and just let her imagination run!

Also recommended!

*this post contains affiliate links that help support Mighty Girls Rock.

Posted on May 15, 2016 and filed under Raising Girls.

Backyard Transformation: Kids Garden!

Woo Hoo it's finished! We are so excited for our Kids Garden reveal! Did you catch the live reveal on Facebook this past Saturday? If not you can see it here: Mighty Girls Rock


That was our first live broadcast. I can't tell you how nerve-racking it is doing a live video. If you didn't notice, my kids starting a sibling rift in the middle (insert laughter/crying emoji)! You should watch it again. At one point Bella just walked off... That is typically how we operate these days.

Last summer we took a corner of our yard that was muddy and turned it into an area for our kids! This was our reveal on Facebook! Fairy Garden and Hopscotch! Follow us! Blog: Mightygirlsrock.com Facebook: https://www.facebook.com/mightygirlsrock/ Instagram: https://www.instagram.com/mightygirlsrock/

Moving on... here are the before pics so you can get an idea of the transformation. We converted a muddy corner of our yard. It doesn't get much sun and it's more of a pain when it rains and the dog tramples through it. We knew we wanted some sort of ground coverage. The kids typically play back there anyways so I thought why not make it theirs?

Before and After...

Off The Beaten Path

In the early stages of planning I knew I wanted a path to wrap around the tree. We used some old tree branches and large river rocks that we had around the yard. We filled in the rest with some smaller river rocks and gravel.

Frankie and Ella!

These super cute lawn gnomes I actually found at Target's Dollar Spot!! The girls named them Frankie and Ella. The little mushroom spikes are from Menards.

Yes, there is a peek a boo grass patch because mushrooms don't grow in mulch. I want to say that was intentional but it we ran out of the landscape liner. It will eventually die.... 

Dinosaurs!

Our garden wouldn't be complete with out these buddies! This was Ryleigh's favorite part and I waited until the next day to surprise her. I told her I thought there were dinosaurs out there eating our hostas because they looked munched on.  She ran out there and came back yelling...

"Mommy you tricked me!! But they aren't really eating the plants because they are fake!"

She squealed with laughter and ran back out to the garden. My little 4 year old logical thinker.

Fairy Garden

Our fairy garden was probably the best part for the girls. They have been begging to create one for the past year! Not only did they pick out the accessories but they help in creating it. I told them that if you create a welcoming garden the fairies will come. We are waiting for sime fairies to drop a little surprise to let us know they settled in. The majority of the fairy accessories came from Hobby Lobby. They have a great selection!

While we were adding the fake moss sheets we actually discovered REAL moss in our yard! So some of those little bits are the real thing. 

The main fairy house is my favorite! We placed it on one of our very flat river rocks. 

I used an artificial succulent stem to create a small little bush. It's right behind the smaller fairy house and fits perfectly.

Hopscotch Pavers

A Pinterest success! This is super easy and so much fun! With a couple cans of spray paint, some outdoor paint, and a foam brush you can easily create this in a couple hours.

Little Extras

We had an old Minnie Mouse watering can that the kids kept kicking around so this was a perfect solution. Once the flowers start to bloom bigger it will look gorgeous. 

Our little toad stool was a total last minute find at Walmart. It's meant for sitting on and I think we are going to get a second one and create a little tic tac toe area for the kids to play.

What do ya think of our kids garden?