
Whether you work full-time at home or occasionally need to conduct business in the evenings or on the weekends, a home office a great way to utilize an extra room. A dedicated workspace in your home can be designed to increase productivity and comfort. Here are 5 ideas to get you started.
Posts filed under Home
DIY China Cabinet Makeover
You guys!
I'm so excited to share my latest project. It's been so long since I've done something big like this and it felt great! I love transforming pieces into something new and refreshing. Since I acquired this china cabinet from my uncle I've been dreaming of the different ways update it to my style.
Backyard Transformation: Kids Garden!

Woo Hoo it's finished! We are so excited for our Kids Garden reveal! Did you catch the live reveal on Facebook this past Saturday? If not you can see it here: Mighty Girls Rock
That was our first live broadcast. I can't tell you how nerve-racking it is doing a live video. If you didn't notice, my kids starting a sibling rift in the middle (insert laughter/crying emoji)! You should watch it again. At one point Bella just walked off... That is typically how we operate these days.
Moving on... here are the before pics so you can get an idea of the transformation. We converted a muddy corner of our yard. It doesn't get much sun and it's more of a pain when it rains and the dog tramples through it. We knew we wanted some sort of ground coverage. The kids typically play back there anyways so I thought why not make it theirs?
Before and After...


Off The Beaten Path

In the early stages of planning I knew I wanted a path to wrap around the tree. We used some old tree branches and large river rocks that we had around the yard. We filled in the rest with some smaller river rocks and gravel.
Frankie and Ella!

These super cute lawn gnomes I actually found at Target's Dollar Spot!! The girls named them Frankie and Ella. The little mushroom spikes are from Menards.

Yes, there is a peek a boo grass patch because mushrooms don't grow in mulch. I want to say that was intentional but it we ran out of the landscape liner. It will eventually die....
Dinosaurs!


Our garden wouldn't be complete with out these buddies! This was Ryleigh's favorite part and I waited until the next day to surprise her. I told her I thought there were dinosaurs out there eating our hostas because they looked munched on. She ran out there and came back yelling...
"Mommy you tricked me!! But they aren't really eating the plants because they are fake!"
She squealed with laughter and ran back out to the garden. My little 4 year old logical thinker.
Fairy Garden

Our fairy garden was probably the best part for the girls. They have been begging to create one for the past year! Not only did they pick out the accessories but they help in creating it. I told them that if you create a welcoming garden the fairies will come. We are waiting for sime fairies to drop a little surprise to let us know they settled in. The majority of the fairy accessories came from Hobby Lobby. They have a great selection!
While we were adding the fake moss sheets we actually discovered REAL moss in our yard! So some of those little bits are the real thing.

The main fairy house is my favorite! We placed it on one of our very flat river rocks.


I used an artificial succulent stem to create a small little bush. It's right behind the smaller fairy house and fits perfectly.
Hopscotch Pavers

A Pinterest success! This is super easy and so much fun! With a couple cans of spray paint, some outdoor paint, and a foam brush you can easily create this in a couple hours.
Little Extras


We had an old Minnie Mouse watering can that the kids kept kicking around so this was a perfect solution. Once the flowers start to bloom bigger it will look gorgeous.
Our little toad stool was a total last minute find at Walmart. It's meant for sitting on and I think we are going to get a second one and create a little tic tac toe area for the kids to play.
What do ya think of our kids garden?
My Natural and Easy Method to Refresh Your Carpets (Household Elf)
Carpet powder is something that I used a long time ago before I had kids and considerate of the chemicals I brought into the house. Most store bought powders have been really irritating to our dogs skin and I would assume the same for kids. Since we have a baby that has recently started to crawl I need to be extra careful about what we use.
Beachy Backyard Cabana for Kids

I've been meaning to post these pictures for some time now. I'm lucky to get it in before the snow starts to fall. It's amazing how the time flies when you have a newborn!
It took several weeks to complete this project as we were trying to beat the rain for 4 weekends in a row, but we finally finished our playhouse for the kiddies just in time for summer and the arrival of our baby!!
We wanted to go for a Key West theme with the colors, sort of like a beach cabana. The girls love it and picked out the colors themselves. Now we just need to cover the grass with sand and make it a beach! Right?


We found some plans online to help guide us. Here are the plans we referenced: The Handmade Home She has an amazing website! We did have to do some modifications to best suit the look and structure we were looking for.
Some structural differences to note are...
Cement block anchors
Extra support braces
Enclosed front entrance at the roof
Climbing wall (built from scratch and used these climbing stones)
Ladder (used scrap wood)
Siding of the house (much easier to put up and saves a ton of time)
This baby is solid! When I mean solid, I mean it doesn't move an inch. We fit 8 adults and a couple of children up on the deck and it still didn't budge! We get a lot of rain and I wanted to make sure the wood pillars didn't rot while touching the ground so we used the cement support blocks.


I really like how we used the white translucent corrugated fiberglass roofing. It lets in more light than the metal roofing does and it gives it a softer touch to go along with the beachy theme.
We even added some plant hooks at the front of the structure to hang some planters for the extra girlie touch! Since my daughter loves to play teacher, we definitely needed to add this chalk board that we secured on the back wall. I used the back side of the leftover siding and chalk paint.

Our Favorite Fall Football Recipe and a Happy Home Face-lift!
Hey Ladies!
I hope you all had a fantastic weekend! The weather here in Chicago was absolutely gorgeous with that brisk hint of fall! This weekend was packed with changes and a fun recipe I have to share with you all today. The hubby LOVES his Cowboys and he also loves my Chili to go along with his Football! See the recipe below....
Our happy home had a face-lift! My favorite color since I was a young has been yellow. I was really bummed when the samples came out when deciding on the siding and yellow was not included. I chose the closest thing, Vintage Cream. Turns out Vintage Cream was pretty much the color I had been looking for all along! SCORE! I like a pretty traditional looking home, which is why I opted out of the suggested slates and gray tones. They say yellow is inviting to guests and that's exactly what I wanted them to feel when they walked up to the house. Here are the transformation pictures. I am probably going to add some shutters eventually.


Football Chili
This recipe makes a ton! Seriously, if your family is 4 and under, maybe cut the recipe in half.
What you need....
2 pounds of ground turkey
2 jalapeno pepper (minced)
1 red onions (diced)
1 Green Bell Pepper (diced)
1 Red Bell Pepper (diced)
12 cloves of garlic (minced)
3 teaspoons Garlic powder
1 tablespoon onion powder
1 tablespoon Cumin
2 teaspoons Cayenne pepper
3 tablespoons Chili powder
2 tablespoons Paprika
8 dried pasilla chili peppers
4 tablespoons of olive oil
2 cans Black beans in the juice
3 cans Pinto Beans in the juice
2 cans Kidney Beans in the juice
3 cups Tomato Sauce
1/3 cup of Tomato Paste
1 cup of low sodium chicken broth
What you do....
First, you need to re-hydrate the pasilla chili peppers for about 30 minutes in hot water. Although these are a sweeter hot pepper, don't let that fool you. Wear gloves when handling these peppers, especially after you have re-hydrated them.
After you have re-hydrated them, take out the seeds and gooey stem, and give them a nice chop.
Warm a large pot (like a stock pot) and heat the oil on high. Once the oil is hot add the onion, peppers, garlic, jalapenos, and pasilla chile peppers. Saute for 8 minutes until you have a nice caramelization. You house will be smelling real good at this point!
Gently turn in the ground turkey until browned, about 4 minutes.
Stir in the tomato sauce and tomato paste for about 4 minutes.
Add chicken broth and seasonings. Once combined add the black, pinto, and kidney beans in with their liquid.
Stir and lower heat. Cook the chili uncovered for at least one hour.
Serve with your favorite garnishes.... cheddar cheese, sour cream, oyster crackers, avocados....
Happy Monday!
Container Gardening and free classes with Craftys!
I've always wanted to have my own farm with tons of gardening beds to grow enough fruits and vegetables to feed my family for the entire year! Living on a farm and having enough acreage to have a garden of that size is not very easy or financial realistic living in the suburbs of Chicago. Unless, you want to drive far outside the area to afford something like this.
We were blessed to purchase a home that has an amazing backyard. To be honest, the deciding factor in our home search was the yard. We're outdoorsy people and need a space where we could really do what we want. With that being said, I need to be methodically and inventive with how I plan my garden this year. While it would be amazing to fill the entire backyard with raised garden beds that wouldn't be fair to the kids or the hubby. So instead I am looking more into container gardening and utilizing our amazing and rather large deck as a place to layout my plans.
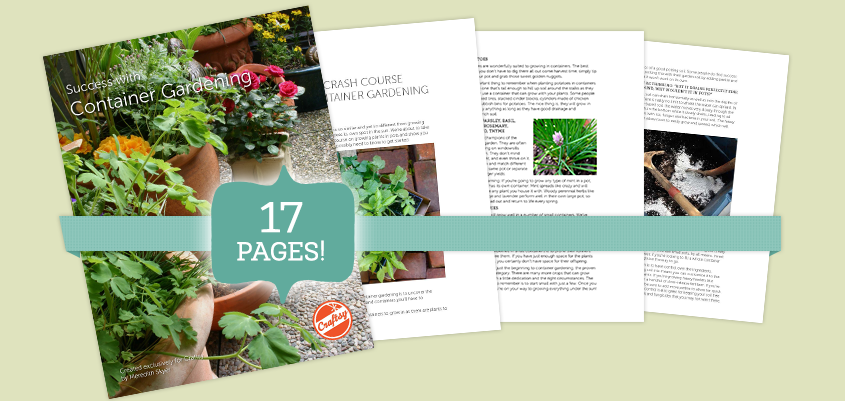
Craftsy offers this free PDF on container gardening. This is a great resource to get started. Not only does it give you a crash course on container gardening, it also educates you on the best plants for this type of option. My favorite part was the recipe on how to make your own potting soil! Container gardening is a great option for anyone who is limited on space such as an urban garden.

Craftsy also offers free online gardening classes! Make sure to check out their website because it doesn't just stop at gardening! They offer a wide selection of online courses from embroidery to woodworking or paper crafts!
Would you like to see more of the free resources that Craftsy has to offer? I would be happy to share some more with you! Please share the area you are most interested in!

*This post contains my affiliate link that helps support my family.
Fireplace Alternatives and Mantel Decor

When we were house hunting a year ago, it was one of the things "on the list".
When we found our home, it sadly lacked this feature.
So we improvised!
For Christmas last year, my parents bought us one of those portable fireplaces that you put the gel cans in. It actually generates a nice amount of heat. I love this feature for our living room. It was really boring and bare and this gives it a sort of sophistication and style.
I finally got around to taking some pictures of the current decor before it changes for the fall. I'm one of those people that like to change it up seasonally.
I believe this fireplace was purchased from
outlet store in Wisconsin.
Now we just need to put some hardwood flooring in and paint the trim white and I'll really get the design style I'm looking for! These are all plans down the line....

"Change your thoughts and you will change the world" is what is printed on the butterfly plaque.

I really love this camera and it expresses one of my true passions. The shiny silver goes along with the design and color palette and matches the frame of the mirror and the mercury glass hurricane vase.

Dollar store finds!!! The Marble vase and the angel statue were only a buck!


My little photo bomber!
Items featured above
White candle holder and Mercury Hurricane vases are from Kirkland
Alice in Wonderland Teapots from Tren-D in Downtown Disney
Camera from Ross
Butterfly plaque from Home goods store
Marble vase from Dollar Tree
Angel from Dollar Tree
Mirror from Home goods store
Don't forget to show some love and follow me on

Our Deck Renovation

Since my hand is out of commission and I don't enjoy the chicken pecking, I figured I would post a picture gallery of the before and after of our latest deck renovation project.
The deck was one of the selling features in our home but definitely needed a face lift. Some of the top boards were rotted and ready to put a foot through. We started by replacing those boards and were relieved to find a perfectly nice deck foundation.
I do have a funny story about when we power washed our deck
,
both a flood and a fire in one day! I will leave that for next time:)

This was a weekend in itself!

Sand off the peeling paint.

Switched out our flood lights for these babies! The motion sensor was so off and would drive me nuts. Yes, it lacks a bit of security but I'm not a fan of flood lights.

Two coats of a chocolate solid stain and a pinto white solid stain.
It took us a total of 3 weekends... including the weekend of flood and fire, which was kind of a wash.
What do ya think?
If you like what you see here, be kind and follow along on

New house and First Time Gardener
One of the most exciting things since we bought our home last November was to start planning our home garden! This will be my first year starting a garden and I may have taken on more than I could handle. We spent a good amount of money already on
, which I have no idea about the plants we ordered. I am a newcomer to this so bare with me. I am a master at research and finding the information I need, so I hope to share with you along the way to my first real garden.
Since I live in a
region, the last day for frost is the end of May. There are different types of seeds that you need to plant indoors ahead of time, this is why it's important to start your planning well in advance!
When my seeds first arrived I couldn't wait to sort them all. I sorted them into 4 groups based upon the time I would start planting. The packaging on the the seeds is a great source of information. Read them very carefully.
These are the groups I divided them into:
12-10 weeks before the last frost threat (indoors)
8-10 weeks before the last frost threat (indoors)
4-6 weeks before the last frost threat (indoors)
sow right into the outdoor garden
This weekend I planted the 12-10 weeks group.
Artichokes
White onion
Red onion


I used three pots for the artichokes, 6 pots for the white onion and 6 for the red onion. I still have to come up with some crafty labels, but for now I took a picture for reminder.

I used organic choice potting mix by Miracle-Gro. I wasn't sure of this mix but it stated the it works for vegetables, fruits, flowers and herbs. It's suppose to feed up to 2 months. I hope I made the right choice. For any experienced gardeners out there, what would you recommend?

Bella always wants to help in everything I do, so of course she had to do this too. I used this as an opportunity to discuss the seasons and plants. These are some of the unit study topics we will be covering this spring. Hands on learning opportunities are always great for the little ones!


I planted two to 3 seeds to a pot. This may require some thinning out later to allow the roots flourish.

Depth:
The onion seeds required only a top sow or lightly covered with soil. It's important to make sure you pay close attention to all the directions on the packet, including the depth to which you will plant the seeds.

Once we were all finished digging in the dirt, we lightly watered the pots with a spray bottle and covered with plastic wrap. The plastic wrap helps keep the moisture in and creates a green house. You want to make sure your seeds and soil don't dry out at any time!

There ya go! This is the start to what I pray will be a wonderful season in the garden! I plan on planting the second group in about two weeks, which includes an exciting assortment of peppers! If you have any suggestions for a first timer, please feel free to leave them in the comment section. I can use all the help and advice I can get!
Helpful Resources
These are two books that I have been referencing through out this adventure! They are both great options for a beginner like me!

52 How-tos Every New Gardener Needs to Know Beginner's Illustrated Guide to Gardening
By Cool Springs Press / Cool Springs Press

The New American Homestead: Sustainable, Self-Sufficient Living for the 21st Century
By John H. Tullock / Howell Book House
If you like what you read today, kindly
Subscribe to 3 Wittle Birds by Email
*This post may contain affiliate links that help support this blog and my family.